
티스토리 뷰
Step-by-Step Guide to Building and Running a Flask Server on Docker
creams 2023. 3. 16. 07:34"Setting Up a Backend Server with Flask in a Docker Environment"
"Creating a Docker Image for Flask Application"
"Step-by-Step Guide to Building and Running a Flask Server on Docker"
"Easy Backend Server Setup with Flask and Docker"
"How to Deploy a Flask Server using Docker for Development"

Today, I'll try to set up a backend server using Flask in a Docker environment, and I'll make it easy for you to follow along. For this, I'll be using VS Code and the terminal for my practical work.
Create Flask App.py
from flask import Flask

app = Flask(__name__)

@app.route('/')
def hello():
    return 'Hello Flask World'

if __name__ == '__main__':
    app.run()
Please create an app.py file in the parent directory with the following content.

Please write a Dockerfile
This file is used to build a Docker image
FROM python:3.9

COPY requirements.txt requirements.txt
RUN pip install -r requirements.txt

COPY . /app

WORKDIR /app

CMD ["python3", "-m", "flask", "run", "--host=0.0.0.0"]
Create a new file called Dockerfile and include the following content:
To briefly explain the contents of the script:
- FROM python:3.9 : specifies which virtual environment engine to use when Docker runs as a container
- COPY : copies local resources to the resources Docker will upload (similar to the cp command in Linux)
- RUN : executes commands during Docker build
- WORKDIR : sets the directory path when the Docker virtual environment is launched
- CMD : specifies the command to be executed when the Docker virtual environment is launched
This file creates a Docker image based on Python 3.9. The image is configured to work in the /app directory, and the requirements.txt file with the necessary libraries is copied. Then, app.py is executed to start the Flask server.
Write a requirements.txt file
docker build -t flask-server .
Save the image with the name 'flask-server'
Run the Docker container
docker run -p 5000:5000 flask-server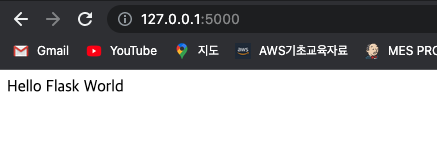
Run the built Docker and check if it's properly uploaded at the address 127.0.0.1:5000.
That's it for today's tutorial!
'Dev Story > Docker' 카테고리의 다른 글
| Docker 설치 방법 (Ubuntu 버전) (0) | 2023.04.27 |
|---|---|
| Introduction to Docker: History, Advantages, Disadvantages, and Usage Examples (0) | 2023.03.16 |
| Docker 꿀팁!! 한눈에 보는 명령어 정리 집 (0) | 2023.03.14 |
| Docker 쉽게 하는 용량 관리와 확보 방법 노트 (0) | 2023.03.14 |
| Docker로 Python Flask 서버 구성하기 (0) | 2023.03.13 |
- Total
- Today
- Yesterday
- lambda
- cloudcomputing
- ChartGPT
- DevOps
- 한식
- frontend
- svelte 따라해보기
- 쉽게따라하기
- python
- ML
- 티스토리
- svelte
- 클라우드
- Docker 관리
- docker
- 딥러닝
- AI
- 따라하기
- 실습
- 개발이야기
- MongoDB
- AWS
- Containerization
- ubuntu
- GPT
- nestjs
- typescript
- 따라해보기
- EC2
- Redis
| 일 | 월 | 화 | 수 | 목 | 금 | 토 |
|---|---|---|---|---|---|---|
| 1 | ||||||
| 2 | 3 | 4 | 5 | 6 | 7 | 8 |
| 9 | 10 | 11 | 12 | 13 | 14 | 15 |
| 16 | 17 | 18 | 19 | 20 | 21 | 22 |
| 23 | 24 | 25 | 26 | 27 | 28 | 29 |
| 30 |